
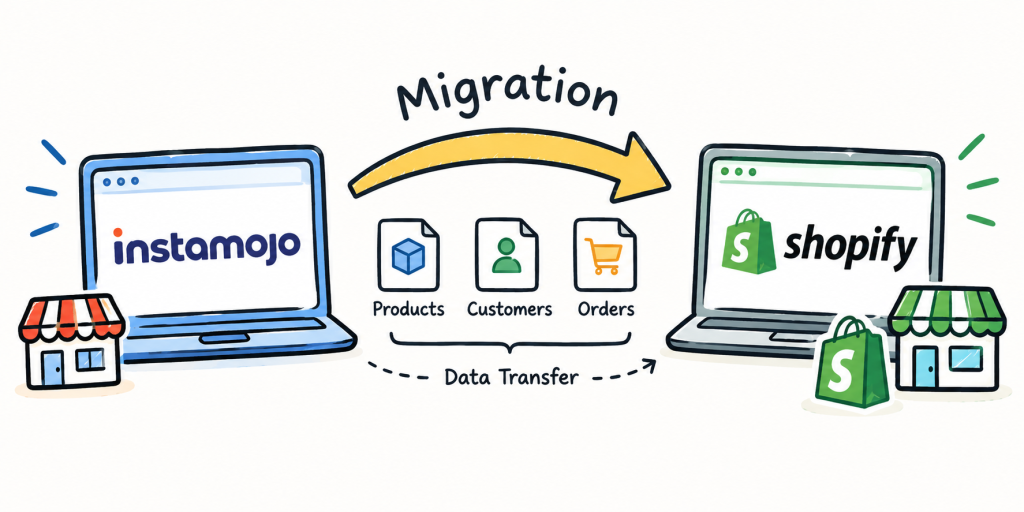
1. Introduction to migrating from instamojo to shopify
The TL;DR
- Why Switch? While Instamojo is great for quick payment links, migrating to Shopify unlocks complete design control, advanced scalability, thousands of apps, and a full-fledged e-commerce ecosystem.
- Smart Preparation & Partner Advantage: Keep your old Instamojo site live during migration to save broken image links, and consider partnering with a Shopify Partner like Ultimate Coder to build your store in a staging environment—saving you from paying monthly subscription fees during the 2–3 month design and data-cleaning phase.
- Flawless Data & SEO Execution: Clean your CSV files to avoid classic bugs (like physical items marked as “Shipping Not Required”), import data in the correct sequence (Products first, then Customers, then Orders via Matrixify), and protect your search rankings by setting up 301 redirects before updating your custom domain’s DNS.
- Launch & Grow: Leverage Shopify’s native marketing tools (like Shopify Email and Flow) or powerful apps to automate recovery flows, trigger customer perks for password resets, and scale your brand stress-free.
Why It’s Time to migrate from Instamojo to Shopify
Instamojo is a fantastic launchpad when you just need to collect payments quickly without sinking days into site design. But as your order volume grows, relying on simple payment links starts to feel like wearing shoes that are two sizes too small. Moving to Shopify takes you from a basic payment gateway to a full-blown e-commerce powerhouse. You get complete control over your store’s design, access to thousands of apps to boost sales, and a platform built to handle massive traffic without breaking a sweat.
Moving Your Data Without the Mess (And Avoiding Rookie Mistakes)
When you’re ready to make the jump, moving your product catalog isn’t as simple as clicking “copy-paste.” You’ll need to export your product data and clean it up in Excel or Google Sheets to match Shopify’s formatting rules. A super common hiccup here happens in the “Variant Requires Shipping” column. If that column gets left blank or messed up during formatting, Shopify assumes your physical product is a digital download and tags it as “Shipping not required” at checkout—meaning zero shipping costs are calculated! Taking time to audit your data before bulk uploading saves you huge headaches down the road.
Protecting Your Google Rankings & Launching Glitch-Free
The biggest fear with moving platforms is losing all the hard-earned SEO traffic you’ve built up over time. To keep your search rankings safe, you’ll need to set up 301 redirects that map your old Instamojo URLs straight to your new Shopify pages so search engines (and buyers with bookmarked links) don’t hit 404 error pages. Before you officially hit “Publish,” run through a complete pre-launch checklist: import your customer database so repeat buyers keep their purchase history, test a live test-payment through your checkout, and verify your new sitemap in Google Search Console for a seamless go-live day!
2. Pre-Migration Checklist: Preparing Your Data for migration from Instamojo to Shopify
Before you flip the switch on your new Shopify store, you need a solid game plan for your data. Moving platforms isn’t just copying and pasting; it requires careful collection, cleaning, and sequencing so you don’t lose your history.
Step 1: The Ultimate Data Roundup
Start by gathering all your core files from Instamojo into one dedicated folder on your computer. You’ll need three main datasets:
- Product Data: Titles, descriptions, variants, pricing, and SKUs.
- Customer Data: Names, email addresses, phone numbers, and saved addresses.
- Order Data: Historical purchase records, fulfillment statuses, and invoice details.
Step 2: The Golden Rule — Keep Your Instamojo Site Live!
Here is a massive trap many store owners fall into: do not shut down or cancel your Instamojo subscription until the migration is 100% complete and tested.
Why? The product image links you get from an Instamojo data export are relative URLs tied to their platform. The second your old store closes, those links die. Keeping Instamojo live allows you (or your development team) to visually verify products, salvage image files, and ensure your new Shopify store doesn’t launch with a bunch of broken, blank product images.
Step 3: Formatting and Importing Your Data from Instamojo to migrate to Shopify
Once your files are safe, it’s time to format them to match Shopify’s standard CSV templates:
- Products & Customers: These are the easiest to handle. Clean up your CSV columns in Excel or Google Sheets, then upload them directly using Shopify’s built-in import tool.
- Orders (The Sequencing Trap): You can’t just dump order history straight away. You must import your customer data first. If Shopify tries to import an order for a customer profile that doesn’t exist yet, it will throw an error. For smooth order migration, specialized apps like Matrixify are your best friend.
Shopify Account Prep & The Hidden Cost of Subscriptions During Migration to Shopify
When migrating to Shopify, one of the biggest initial misconceptions is that you need to purchase a live subscription right from day one. If you go the solo route, you have to buy a paid plan the moment you create your staging store.
However, partnering with an experienced Shopify Partner completely changes the financial timeline. Shopify Partners create and build your store inside a Development Store environment. This means your store remains fully functional for design, content uploading, and data migration without you paying a single rupee in monthly Shopify subscription fees during the build phase.
Why Timeline Matters
Because you are upgrading to a much more powerful platform, it’s easy to get distracted exploring new features, which naturally extends your project timeline. On average, a complete store migration and redesign takes 2 to 3 months for:
- Custom design and UI/UX reviews.
- Creating new copy and assets for expanded sections.
- Sanitizing, cleaning, and bulk-importing legacy data.
If you build it yourself or hire a non-partner, you’ll be shelling out monthly subscription fees plus development costs while the store sits in staging for months. With a Shopify Partner, you only pay the development fees during the build phase, and you only activate (and pay for) your subscription the exact day you go live.
Partner Developer vs. Non-Partner Developer: Comparison Table
Feature / Cost Factor | Partner Developer (e.g., Ultimate Coder) | Non-Partner / Solo DIY Setup |
Shopify Subscription Fees during Migration | $0 (Hosted on a free Development Store until launch) | Active from Day 1 (Paying monthly subscription while building) |
Financial Risk During 2–3 Month Build Time | Zero wasted subscription costs if development takes longer than expected | Paying platform fees for a store that isn’t generating live revenue yet |
Access to Advanced Features & Testing | Full access to test apps, themes, and configurations without plan restrictions | Restricted or costly depending on the trial period or chosen tier |
Data Migration & Error Handling | Handled by experts using advanced tools (like Matrixify and custom scripts) | Manual trial-and-error, high risk of broken image links and shipping errors |
Go-Live Transition | Seamless handover; ownership transfers to you the day you choose your live plan | Store is already active; you just remove the password protection |
Need Expert Hands? Let’s Make It Stress-Free.
Data mapping, formatting errors, and broken image links can quickly turn a DIY migration into a weekend-long headache. If you’d rather skip the technical stress and guarantee everything transfers seamlessly—from customer histories to complex SEO structures—it pays to bring in the pros.
Ultimate Coder is an experienced Shopify partner specializing in smooth, end-to-end e-commerce store migrations. Whether you need a quick audit or a complete platform overhaul, we’ve got you covered.
Ready to make the switch to Shopify without losing a single customer or order? Let’s talk! Reach out to the team at Ultimate Coder today at info@ultimatecoder.in and let’s get your store migration done right.
3. Step-by-Step Product Data Migration Process
Moving your product catalog, customers, and order history requires precision. A single misaligned column or broken workflow can disrupt your store launch. Follow this structured roadmap to execute a seamless migration.
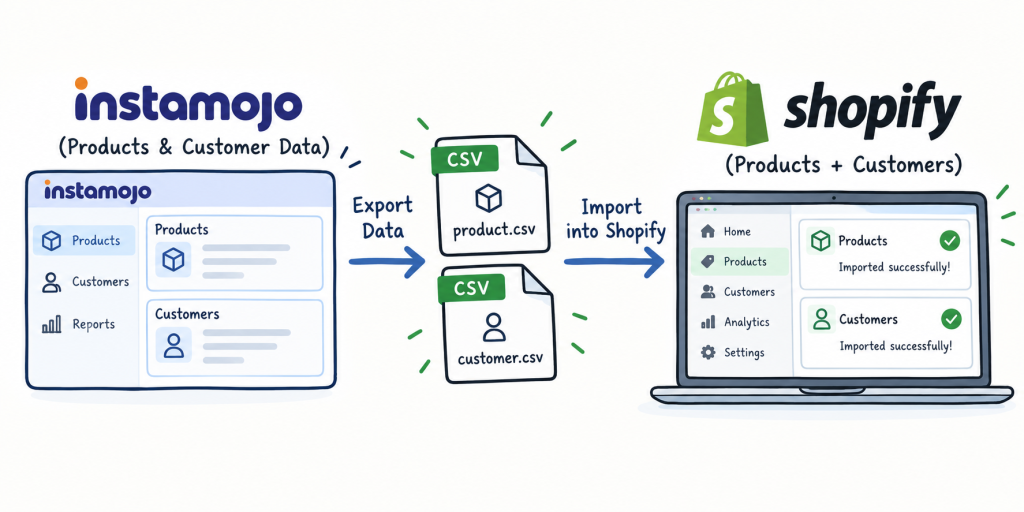
Step 1: Exporting Data from Instamojo
Your first mission is to extract everything safely out of your old dashboard and into one secure local folder.
- Download CSV Exports: Generate and download your complete exports for Products, Inventory, and Customer lists from Instamojo.
- Secure Your Media: Remember that Instamojo image URLs are relative and will break the moment your old store closes. Ensure your product images are either downloaded locally or preserved so they can be re-linked to your new catalog.
Step 2: Reformatting & Mapping Data to Shopify Standards
Instamojo and Shopify use completely different database structures. You cannot just drag and drop your raw CSV files into Shopify.
- Map the Fields: Transform your Instamojo data columns to match Shopify’s required template (Handle, Title, Body HTML, Vendor, Type, Tags, Variant SKU, Variant Price, and Variant Inventory Qty).
- Automate Your Cleanup: Save hours of manual Excel formatting by using smart conversion utilities. You can streamline this entire mapping process instantly using the Instamojo to Shopify CSV Reformatting Tool, which automatically structures your raw exports into a 100% Shopify-compatible format.
- Organize Collections: Decide how your products will be grouped on Shopify by setting up Manual Collections (curated lists) or Automated Collections (tag- or price-based rules).
Step 3: Importing Products & Customers into Shopify
The order in which you import your data matters immensely. Doing this out of sequence will trigger database errors or broken customer associations.
- The Correct Sequence: Always import your Products first, followed by your Customer profiles, and finally your historical Order records (utilizing a specialized tool like Matrixify). Importing orders before customer profiles creates orphan data and leads to import failures.
- Post-Import Audit: Once the upload is complete, rigorously check your listings. Verify pricing accuracy, tax settings, inventory quantities, and ensure that your product images loaded correctly without showing broken links.
Step 4: Handling Customer Accounts & Password Resets
Due to security and encryption protocols, customer passwords cannot be directly exported or migrated from Instamojo to Shopify.
- Managing the Transition: Let your customers know ahead of time that they will experience a fresh, upgraded platform experience.
- Activation Emails: Once your Shopify store is officially live, trigger automated account activation emails to your past customer base. This allows clients to securely set a new password with a single click and regain instant access to their order history.
Instead of just sending a dry account reset link, seize the opportunity to delight your customers:
- Send an Update Email with Perks: Roll out an announcement email welcoming them to the upgraded store packed with a special incentive. Offer an exclusive discount code or a loyalty perk (e.g., “Welcome to our new home! Reset your password today and enjoy 15% off your next order”). This turns a routine security step into a powerful sales conversion driver.
- Assure Active Orders: Reassure your community that their ongoing or pending orders placed on the old platform are completely safe. Clearly remind them that all active orders will still be processed, fulfilled, and delivered on schedule without any disruption.
4. Rebuilding Design, Payment & Operations on Shopify
Once your data is cleanly structured, the next phase focuses on building a high-converting storefront, configuring seamless localized payments, and setting up reliable shipping workflows.
Theme & UI Setup
Your store’s design directly impacts trust and conversion rates. Upgrading to Shopify lets you step away from rigid templates and build a tailored user experience.
- Select a High-Performance Theme: Choose a modern Shopify theme optimized for speed, mobile responsiveness, and high conversion rates (e.g., Dawn, Impulse, or custom liquid builds).
- Recreate Core Pages: Build engaging, brand-aligned pages for your homepage, Product Detail Pages (PDPs), About Us, Contact, and essential compliance pages (Shipping, Refund, and Privacy Policies).
Payment Gateways & Localization
E-commerce shoppers expect flexible, instantly recognizable payment options at checkout.
- Payment Gateway Options: Activate integrated gateways like Razorpay, Cashfree, or Paytm for frictionless UPI, credit/debit card, and net banking support. Alternatively, you can retain Instamojo as an external payment provider via API integrations.
- Cash on Delivery (COD) & Fraud Prevention: Configure clear COD rules, fee surcharges, and phone number verification (OTP checks) to reduce Non-Delivery Reports (NDR) and prevent fraudulent orders.
Logistics & Shipping Rules
Ensure smooth order fulfillment by connecting your store directly with local courier aggregators.
- Shipping Zones & Rates: Set up clear shipping tiers—such as flat-rate shipping, free shipping thresholds, or weight-based calculations across domestic zones.
- Courier Integrations: Seamlessly connect automated logistics apps like Shiprocket or Delhivery to enable auto-syncing of orders, bulk airway bill (AWB) generation, and automated WhatsApp/SMS tracking notifications for customers. Or a Shipping provider of your choice. You can also do shipping manually and update the order with the tracking number to let the customer know.
5. Protecting SEO Traffic during Shopify Migration (301 Redirect Strategy)
Moving platforms is exciting, but a botched technical transition can tank your Google search rankings overnight. Protecting your domain authority, indexed pages, and custom domain routing requires careful execution of two major components: 301 redirects and DNS record updates.
URL Structure Differences & 301 Redirect Mapping
Instamojo and Shopify organize product and category pages using completely different backend routing structures.
- The URL Shift: While Instamojo often relies on custom or flat links (e.g., [yourstore.com/l/product-name](https://yourstore.com/l/product-name)), Shopify enforces a rigid, SEO-optimized hierarchy using specific prefixes like /products/product-name and /collections/collection-name.
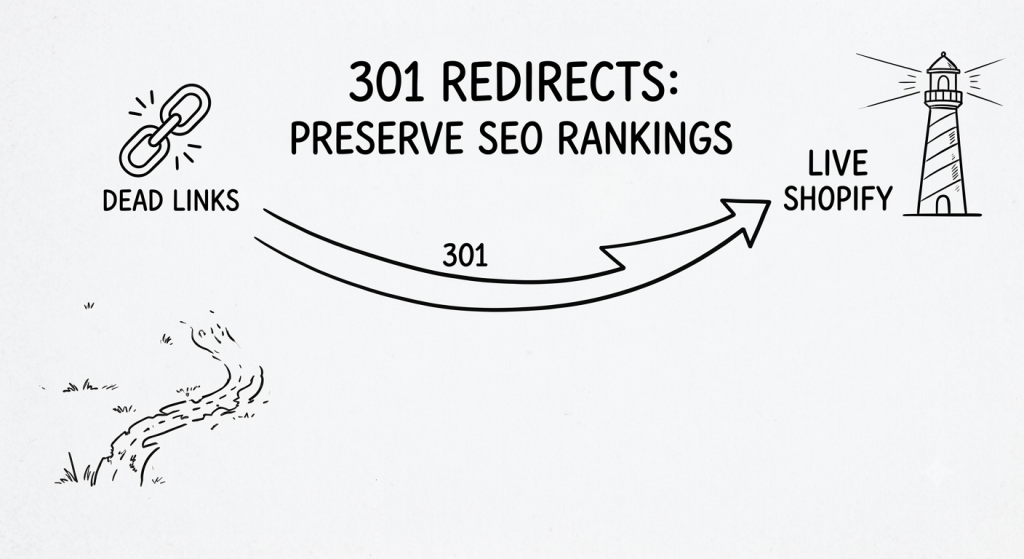
- Mapping 301 Redirects: If you leave these unmatched, customers and search engine bots clicking your old links will hit frustrating 404 “Page Not Found” errors, instantly destroying your search equity. To prevent this:
- Export a complete list of your existing URLs from Google Search Console.
- Create a clean mapping spreadsheet pairing every old Instamojo URL to its new Shopify equivalent.
- Bulk upload your redirect file straight into Shopify’s native URL Redirects manager (Online Store > Navigation > View URL Redirects) before you flip the switch. This does a 301 redirect from an already indexed URL to the new URL. preserving the SEO ranking.
Updating Domain DNS (Going Live Phase)
This step represents your official Go-Live Day. You do this after purchasing the Shopify Subscription. Once your new Shopify store is fully styled, populated with sanitized product data, configured with payment gateways, and tested thoroughly, it is time to point your live custom domain away from Instamojo and over to Shopify.
Step-by-Step Go-Live DNS Process
- Log into Your Domain Registrar: Access the admin panel of the provider where your custom domain is registered (e.g., GoDaddy, Hostinger, Namecheap, or Squarespace/Google Domains).
- Update DNS Records: Modify your active DNS settings so your domain points directly to Shopify’s global server infrastructure:
- A Record: Change your root domain’s (@) A Record to point to Shopify’s dedicated IPv4 address: 23.227.38.65 (verify the IPv4 address once on your shopify dashboard before changing the (@ ) A record)
- CNAME Record: Update your www subdomain CNAME record to point directly to shops.myshopify.com
- Verify Connection in Shopify: Head over to your Shopify Admin (Settings > Domains), click Connect Existing Domain, enter your domain name, and hit Verify Connection.
- SSL Provisioning & Security: As soon as DNS propagation completes (which typically takes anywhere from a few minutes to a couple of hours), Shopify automatically provisions and installs a free, secure SSL certificate, ensuring your new store instantly serves all traffic safely over https://.
6. Post-Launch Marketing & Growth Engine
Flipping the switch on your new Shopify store is just the beginning. The real superpower of moving away from a gateway-first platform like Instamojo is unlocking Shopify’s massive ecosystem of automated marketing channels, sales integrations, and customer retention tools.
Automating Customer Journeys
Instamojo’s basic transactional emails leave a ton of revenue on the table. On Shopify, you can replace simple receipt emails with highly targeted, automated email and SMS marketing flows using powerful apps like Klaviyo or Omnisend:
- Abandoned Cart Recovery: Automatically follow up with shopper drop-offs to win back up to 15–20% of lost sales.
- Welcome Series: Warm up new subscribers with special introductory discounts, brand stories, and product highlights.
- Post-Purchase Follow-ups: Send automated review requests, cross-sell recommendations, and order tracking updates.
Keeping It All Built-In: Leveraging Shopify’s Native Marketing Suite
If you want to keep your tech stack lean, cut down on monthly app costs, and avoid third-party software setup, you can run your marketing automation directly inside Shopify using its native ecosystem: Shopify Messaging (Shopify Email) and Shopify Flow.
1. Shopify Messaging (Native Email & SMS Automation)
Instead of paying for third-party platforms like Klaviyo right out of the gate, Shopify offers powerful built-in marketing features natively in your admin panel:
- Generous Free Allowance: You get 10,000 free marketing emails every month included with your Shopify store subscription.
- Essential E-commerce Flows: Pre-built templates allow you to set up high-converting sequences—such as Abandoned Cart Recovery, Welcome Sequences, and Post-Purchase Follow-ups—in just a few clicks.
- AI-Powered Personalization & Segmentation: Leverage built-in AI tools to auto-segment buyers by purchase history, deliver dynamic product recommendations, and draft campaign copy.
2. Shopify Flow (Native Back-Office & Triggered Workflows)
Shopify Flow is Shopify’s visual, trigger-and-action automation builder. It lets you connect your store’s backend events directly to your marketing and operations without typing a single line of code:
- Automated Customer Tagging: Automatically tag customers based on total spend or order count (e.g., tag a buyer as VIP when lifetime spend passes ₹10,000) to trigger exclusive native email offers.
- Low Stock & Back-in-Stock Alerts: Trigger internal staff notifications or automated customer alert emails the moment inventory drops below a specific threshold.
- Risk & Fraud Control: Set up custom logic to hold high-risk COD or credit card orders for manual review before sending fulfillment requests to your courier team.
Multi-Channel Sales Integrations
Why limit your sales to just your website? Shopify connects directly with leading social and ad platforms so you can sync your product catalog everywhere your audience hangs out (we will cover multi-Channel sales integration in another article ~Team UC):
- Meta (Instagram & Facebook Shop): Tag products directly in posts, stories, and reels for a frictionless native shopping experience.
- Google Shopping & Performance Max: Auto-sync your inventory to show up at the top of Google search results and shopping tabs.
- WhatsApp Commerce: Connect tools like Interakt or Wati to send automated order tracking notifications, abandon cart nudges, and promotional broadcasts directly to your customers’ favorite messaging app.
Building Customer Retention & Loyalty
Acquiring new buyers is expensive; turning first-time purchasers into repeat brand advocates is where long-term profitability lives.
- Loyalty & Reward Programs: Implement apps like Smile.io or Yotpo or nectar or any loyalty app of your choosing to reward customers with points for every purchase, store sign-up, or social share.
- Subscriptions & Recurring Revenue: If you sell consumables or repeat-purchase items, offer “Subscribe & Save” options (via apps like Recharge or Seal Subscriptions or any other app of your choosing) to build predictable recurring monthly revenue.
7. Common Pitfalls & How to Avoid Them
Migrating platforms is a massive step forward, but moving too fast can lead to costly operational hiccups. Avoiding these four common mistakes will ensure a smooth, headache-free launch on Shopify:
1. Importing Corrupted or Unformatted Product CSV Files
- The Pitfall: Dropping a raw, unedited Instamojo CSV export straight into Shopify without checking columns or formatting. This frequently scrambles variant pricing, deletes product descriptions, or leaves fields like “Variant Requires Shipping” blank—accidentally turning physical inventory into digital downloads.
- How to Avoid It: Always clean, validate, and map your spreadsheet data against Shopify’s official CSV template. Test a small batch of 5 to 10 products first to verify that prices, variants, and images upload correctly before importing your entire catalog.
2. Forgetting to Set Up 301 Redirects
- The Pitfall: Letting your old Instamojo URLs vanish without mapping them to your new Shopify paths. When loyal customers or Google search bots click your indexed links, they land on frustrating 404 “Page Not Found” errors, causing your hard-earned search engine rankings to drop.
- How to Avoid It: Export your legacy URLs, create a 1-to-1 mapping spreadsheet, and bulk-upload your 301 redirects into Shopify’s URL Redirect manager before you go live.
3. Over-Installing Unnecessary Apps
- The Pitfall: Treating Shopify like an app store and installing dozens of third-party plugins for every minor feature. Bloated code, conflicting scripts, and heavy widgets can severely tank your site speed, ruin mobile user experience, and hurt your conversion rates.
- How to Avoid It: Lean heavily on Shopify’s built-in native features and automation tools (like Shopify Flow and native email marketing) first. Only install vetted, essential apps that directly drive revenue or solve a core operational need.
4. Skipping Live Checkout & Guest Mode Testing
- The Pitfall: Assuming your checkout works just because the theme looks pretty, only to discover on go-live day that your payment gateway rejects cards, tax calculations fail, or guest checkouts throw backend errors.
- How to Avoid It: Enable your payment gateway’s test mode (or run a live micro-transaction test), place multiple test orders as both a guest and a logged-in user, and verify that confirmation emails and shipping calculators fire correctly across mobile and desktop.
8. Conclusion & Go-Live Checklist
Transitioning your business from Instamojo to a full-fledged Shopify ecosystem is one of the most impactful upgrades you can make for your brand. By systematically moving your product catalog, safeguarding your customer data, mapping 301 redirects, and setting up localized payments and logistics, you position your store for effortless scaling, higher conversions, and long-term profitability.
Before you officially remove password protection and announce your new storefront to the world, run through this quick go-live Final check.
📋 Pre-Launch Final Checklist
- [ ] Data & Catalog Verification: Confirm that all product titles, prices, variant options, and stock quantities are accurate, and ensure physical items are correctly set up to require shipping.
- [ ] Images & Assets: Verify that all product detail pages (PDPs) display high-quality images without broken image links.
- [ ] Test Checkout & Payments: Place live micro-transaction test orders using both credit/debit cards and UPI, and verify that Cash on Delivery (COD) rules work seamlessly for both guest and registered accounts.
- [ ] Logistics & Rates: Test shipping rate calculations at checkout across different pin codes and ensure automated courier apps (e.g., Shiprocket or Delhivery) sync orders correctly.
- [ ] Email & SMS Notifications: Confirm that native order confirmations, shipping updates, and account activation templates trigger without errors.
- [ ] 301 Redirects & Domain Setup: Ensure your custom domain point to Shopify’s DNS (23.227.38.65 A Record & shops.myshopify.com CNAME), verify SSL activation, and test legacy URLs to make sure they redirect smoothly without 404 errors.
- [ ] Mobile Responsiveness: Browse the store on various mobile devices and screen sizes to ensure header navigation, sticky add-to-cart buttons, and popups function smoothly.
🚀 The Launch & Announcement Strategy
Once your store passes every check on the list, it’s time to celebrate! Launching your new site is a major milestone and a prime opportunity to re-engage your customer base:
- Send a Launch Email Broadcast: Use Shopify Email to announce your brand’s upgrade to your existing customer list. Highlight faster site speeds, improved browsing, and cleaner checkout flows.
- Incentivize Password Resets & First Orders: Offer an exclusive, time-sensitive discount code (e.g., NEWSTORE15 for 15% off) to entice past buyers to reactivate their accounts and place their first order on the new platform.
- Reassure Ongoing Orders: Include a short note in your campaign assuring past customers that any orders placed on Instamojo before the switch are fully processed and currently on their way.
Ready to Make Your Move to Shopify Risk-Free?
Migrating an active e-commerce store doesn’t have to mean lost sales, technical stress, or broken links. As an experienced Shopify Partner, Ultimate Coder specializes in end-to-end platform migrations—handling everything from CSV reformatting and custom theme setup to bulletproof 301 SEO redirects and payment integration.
Want to build a high-converting Shopify store without taking on the technical hassle yourself? Let Ultimate Coder handle your migration from start to finish. Contact us today at info@ultimatecoder.in to schedule your consultation!

